Since I was a kid I always dreamed that I could own an arcade machine of my very own. The only problem was that they were expensive, extremely heavy, and had components that wouldn’t last forever, like the CRT monitor or event the power supplies. The idea of a personal M.A.M.E machine intrigued me for years, but had always seemed like such an undertaking to try to create one — not to mention the costs for all the parts, wood, electronics, etc. Being someone who has never built anything more than a wood clock in shop class, I figured a M.A.M.E machine would be relegated to my day dreams rather than a practical reality.
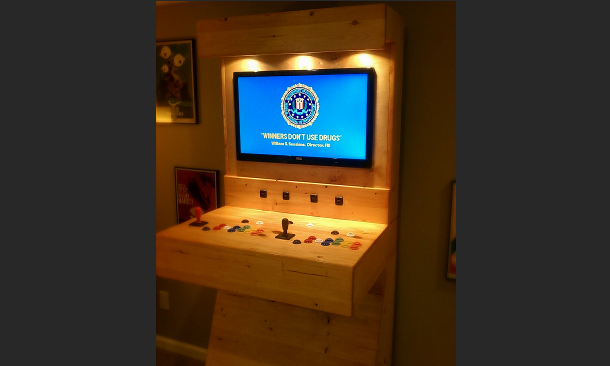
Then for some reason earlier this year, I woke up with the drive to really see how difficult it would be to actually put one together. I had an idea of first trying to create a joystick to play some games on the computer and, if that was successful, take it further. Fast forward 8 or 9 months, and I present to you my personal Arcade machine:
Over the next weeks or months, I plan to detail the process that went into making this, from the drafts and initial ideas, to the build and button wiring, to the PC. When I had decided to go full in on this project, I knew that I didn’t want it to look like a typical arcade machine. After all, I am a grown adult now, and there is something slightly childish about a full sized arcade machine in your basement. I wanted it to look like it fit in a basement, my basement, like a pool table or dart board; that it was something that had a little class, something modern feeling.
Initially, I wanted to have detachable joysticks so I could use them for other old school console projects. I had really planed to make a lot of this modular so it would be easy to move around. I knew I didn’t want it to be a thick, bulky machine and started to draft up an idea of how I thought it should look. As you can see from the below, I still had the idea of a “tray” where I could set two joysticks in, and even mocked up how the joysticks might be built, too.
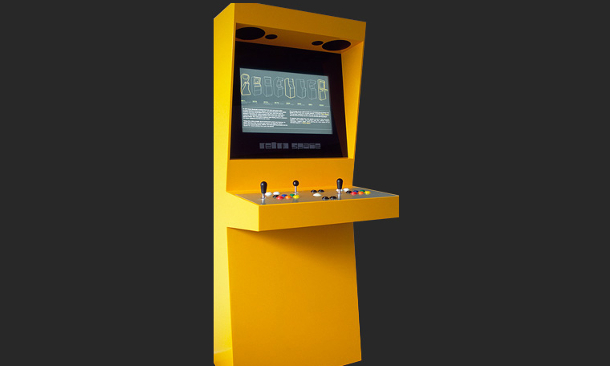
I had looked around online as well for some inspiration to see if there was anything others had built that was along the lines of what I was thinking. I would randomly search here and there when it hit my mind, but I struggled to really find anything that didn’t look like a normal stand up arcade. Finally, one day I found something that was in line with what I was thinking, and somewhat similar to what I had drafted up as a concept. I don’t even recall where I found this, but I do remember it being from kind of an obscure place, and after hours of just browsing around.

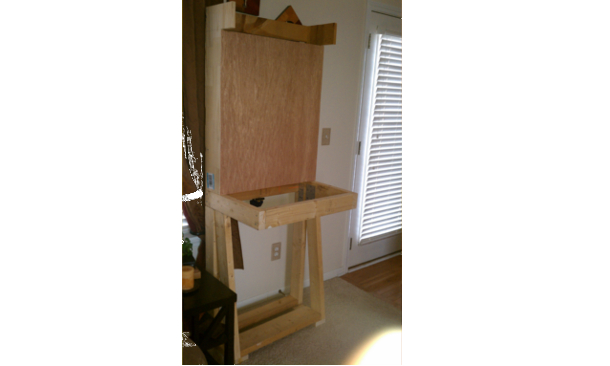
So I had found it, I knew I wanted to combine this inspiration with my design. It looked like it would not be too complex to build, given the basic geometric shape. After drawing some basic measurements, my dad helped me create a simple crude sample out of lumber he had laying around in the garage, just to see if there would be some necessary adjustments that I might need later on (make it taller, shorter, etc). I was glad we did this, because having something to walk up to and get a feel for made the final product that much better. From this mock up, it was clear adjustments would need to be made to the overall size and shape, but the basic design looked solid.

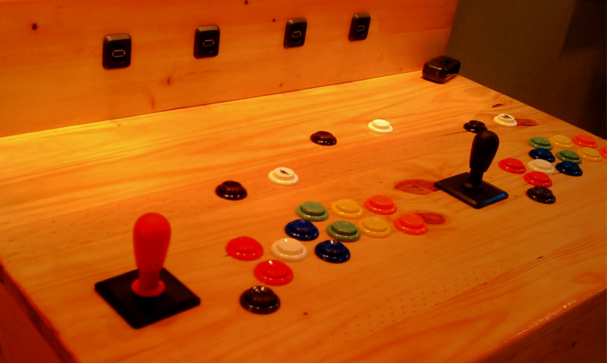
The next issue that I went back and forth on many, many times, was how many buttons to have, how to lay them out, and how to ultimately select and play the games. Should I have two joysticks for playing games, then one smaller one in the center to pick games? I wanted this to accommodate most of the game systems in the last 20-something years, so trying to come up with button placement that made sense for specific games (Mortal Kombat, Street Fighter), as well as something like the Nintendo 64 was a constant struggle. As you can see below I went through many ideas on button layouts until settling, and while it may look like a significant number of buttons I actually really like how this turned out. There is a specific reason for the layout (that I will detail in a later post).

At that point I had drawn up the plan and measurements to accommodate the size of screen and space for the button layouts, and it was time to start getting the materials, which amounted to just buying large pieces of wood by now. The part we built first was the base; we figured that it made the most sense to start ground up, and it was really quite elementary to do so. We made a box out of some spare 2×4’s laying around, and then fashioned the side and front pieces to be affixed to the base. For the most part it all started to fall in line. I was reliant almost 100% on my Dad for guidance, work space (unused garage port) and tools (I have almost none, except a drill my Dad got me for Christmas, that it came in real handy). The tools we were using were modest: we had a band saw and an electric hand saw that was used for about 85% of the project. Things got tense when trying to make a long cut for a critical part with nothing but the electric hand saw, and so we would put down some boards to act as a “guide” for the blade. During the build, the only major issues that came up were figuring out the best way to make the top detach from the bottom while making it look like a single unit, and mounting the LCD screen, which I highly underestimated in its difficulty and is a Hell I never want to revisit.

The basic construction took a while, mostly because this was a project done during off time, and I wanted to take it slow since I have a tendency to just want something done right away. So far I would say this is the most restraint I have shown when doing pretty much anything in terms of not rushing, and it paid off. Once the main unit was completed, I set it up in the living room first, and had it running off a little netbook just to make sure things were going to feel and play like I wanted.

I wanted to confirm this was all okay before staining and finishing it, which is probably the second living Hell I prefer to not endure for a while. Once it was sanded and stained, I took the ole’ gal in the basement and spent the next number of days and weeks wiring up all of the buttons and programming the keys. I ran this off a more powerful PC for a while to make sure I got everything configured and tinkered with completely. Once I could select and quit games and play all the systems as I imagined, I was ready to take off the training wheels and throw together a little somethin’-somethin’ in terms of a new dedicated PC.

As one could imagine, due to the design there isn’t a ton of space in the back, especially because I decided to put a small subwoffer in the back to utilize some old speakers that hadn’t been used in years. This took up most of the little space there was, so I knew the PC was basically going to be attached to a board of some kind to just lean it in the inside. As for the PC build, I can’t say I have done this often; in fact the first PC I built on my own was a little over a year ago, but this, oddly was the easiest and quickest part of the project. I picked out the components online (nothing crazy, but decent), went down to the local Microcenter that same day, unboxed everything, and threw it all together within about 30 minutes. Another 15 minutes had the OS installed, and it was up and rocking.

All that remained was the matter of setting up the new machine and transferring all the games, config files, etc, to the new one. This, for the most part, was a seamless transfer process. I did not have to spend alot of time reconfiguring settings, buttons, etc, etc.
So, that was the basics, but I intend to detail the main portions of the project in upcoming posts. Oh, and if anyone was wondering: this is a Linux box with XBMC software as the “frontend” for all of my games, with a special plugin called “Rom Collection Browser”. It took alot of manual configuring but works well enough for me.


3 Comments